

It’s always awe-inspiring when you see how organised art studios can be. Working from a home studio is very different to working in a rented one. It’s like starting from scratch on trying to make the perfect art creation space.
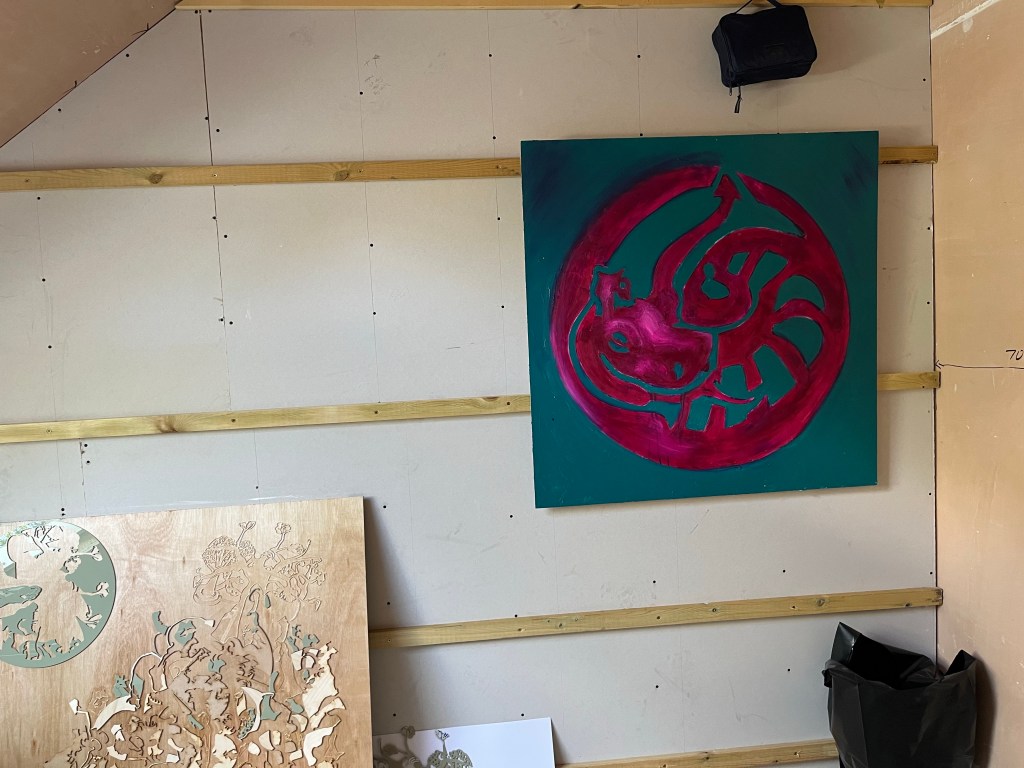
There only problem I have with my new art studio space is the restricted height. This has meant my large studio easel can only be used in the middle of the room. To maximise space and avoid needing a studio easel this art hanging and storage system works brilliantly.
This is a brilliant system that is used by many artists. At the end of this post there are links to videos from David M Keesler and I Am Detour demonstrating the horizontal and vertical batten methods respectively.
What you will need:
- Two people (persuade a friend to help you by holding up one end of the battens while you screw them in)
- Screws: I used 5” screws to get through the 2” of batten wood and into the wooden supports behind.
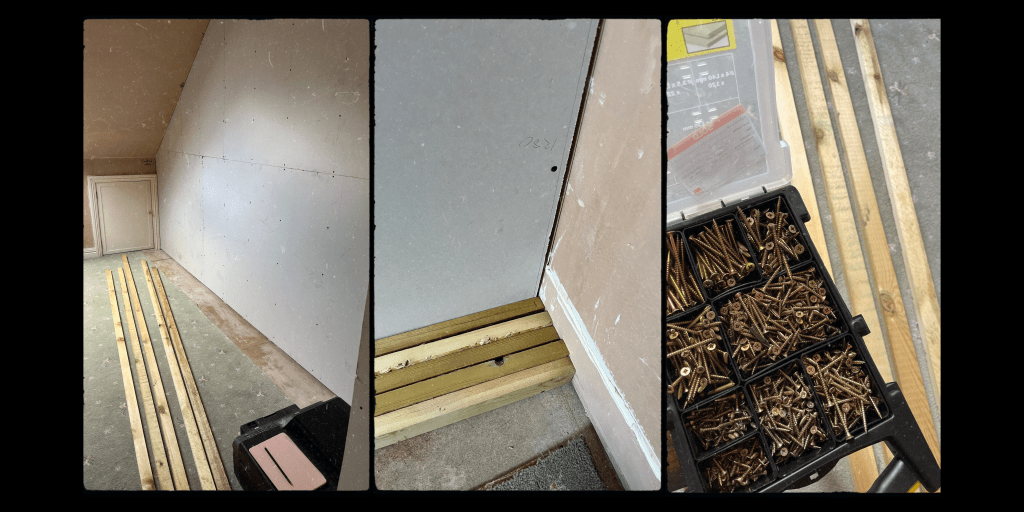
- 2×1” wooden battens, length will depend on the wall width
- Spirit level
- Electric screw driver (spare battery always helpful)
- Pencil
- Jig saw /coping saw (or use pre-cut battens)
- around an hour of free time
If you have an angled roof
- Set Square
- Metal ruler
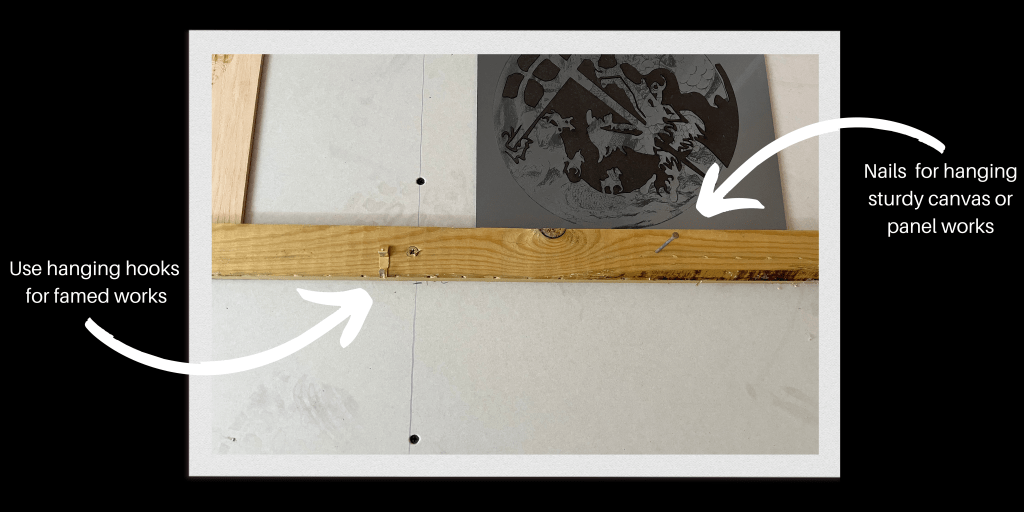
To affix artworks
- Nails / screws / hanging hooks
- Hammer
Always check the wall for electrical wires before you start, cable detectors are cheap and available at most DIY stores.
Where do the battens go?
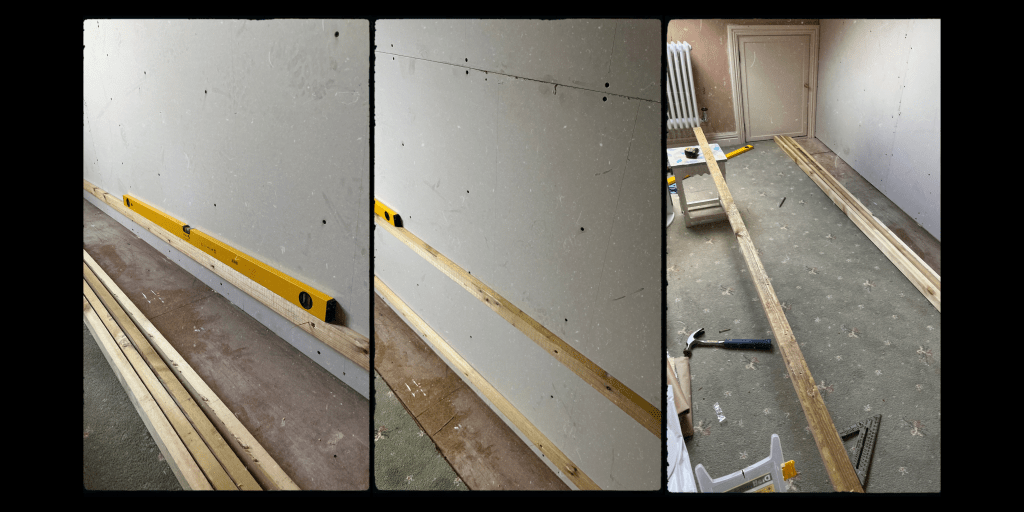
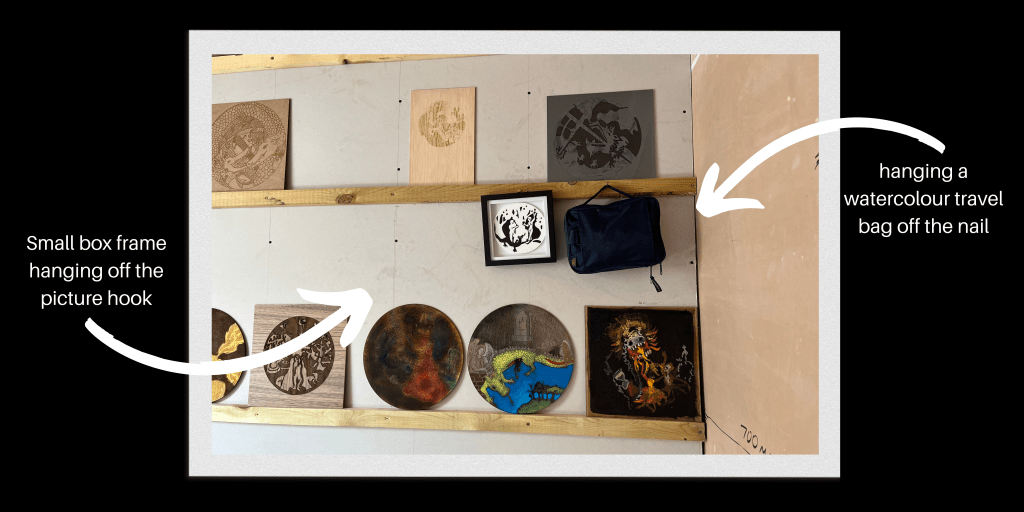
To start with, think about your eye level. Do you paint standing, sitting or both? I used the low tech method of penciling lines where my eye line was while I sat on my usual chair and when standing. I added storage battens at the very top and bottom. The bottom works as an additional shelf for materials or small artworks, the top can hang pieces out the way while I work on other paintings.
If you have plasterboard walls this systems solves the problem of multiple holes breaking up the plasterboard. It strengthens the wall as long as the battens are affixed to the construction timber of the partition wall.
Once you’ve worked out how many battens you want you can order the lengths of timber.
Setting up the stations
Because 2×1″ is light we used a workbench plus a small table to place the battens onto for cutting down. The first step was to cut each one down to length and work out which ones would hit the angled part of the wall.
Using a jig saw they were all cut down at 90 degrees. For the angled cuts a set square and rule were used to mark off the cut angle, then the jig saw to cut. We worked from bottom to top with the battens screwing them in at both ends, then infilled the central screws.

How do you hang work on it when it’s done?
There are a several options with this system. The most obvious is to stack small works on the battens using them as miniature shelves. This is great for storing work in progress or drying smaller works off the floor.

Where the system really come into it’s own though is as a wall easel. When you’re working on canvas or board you can hang these off nails on the battens and work on the wall. When you want to dry them out the way move them up to the highest batten. It allows you to move paintings up and down easily and work on different areas of detail without having to strain your arms or neck.
My new studio!
That’s the behind the scenes insight into how I got my hanging system up and running. I love the flexibility of this system to work as a storage and display option or wall easel workhorse. It’s a frugal way to make the studio more appealing and a foolproof way to arrange your artworks for display and photography.
It’s really simple for two people to do this, my studio took around an hour including set up and break down.
If you’re excited about perfecting your studio space, let me know in the comments what tips you use.
CHARLIE KIRKHAM NEWSLETTER
Sign up for free and be the first to get notified about updates.


Leave a comment